Guides
Get a Salesforce Developer Account & OAuth Connected App
A quick tutorial on how to get a Salesforce developer account, pick the right OAuth scopes, and test your app's connection to Salesforce.

Brian Yam
,
Developer Advocate
3
mins to read
What this tutorial will cover:
How to get a Salesforce developer sandbox
Setting up your Salesforce OAuth application
Configuring scopes for your Salesforce OAuth application
Redirecting users to authenticate their Salesforce account
Production considerations
Testing your OAuth flow & scopes
Ship native integrations for your product 7x faster with Paragon's embedded integration platform, so you can focus on your core product, not integrations. Trusted by engineering teams like AI21, Copy.ai, and Appsmith. Learn more here.
How to get a Salesforce developer sandbox
You can sign up for an account at developer.salesforce.com/signup.
You’ll have to put in a lot of personal and company details to get access, but luckily they don’t seem to send sales reps after developer account signups.

Setting up your Salesforce OAuth application
Create a Connected App
Search for App Manager in the Settings section

[New] You may need to go into the "Settings" under "External Client Apps," but you should be able to toggle the "Connected Apps" and create a "New Connected App"
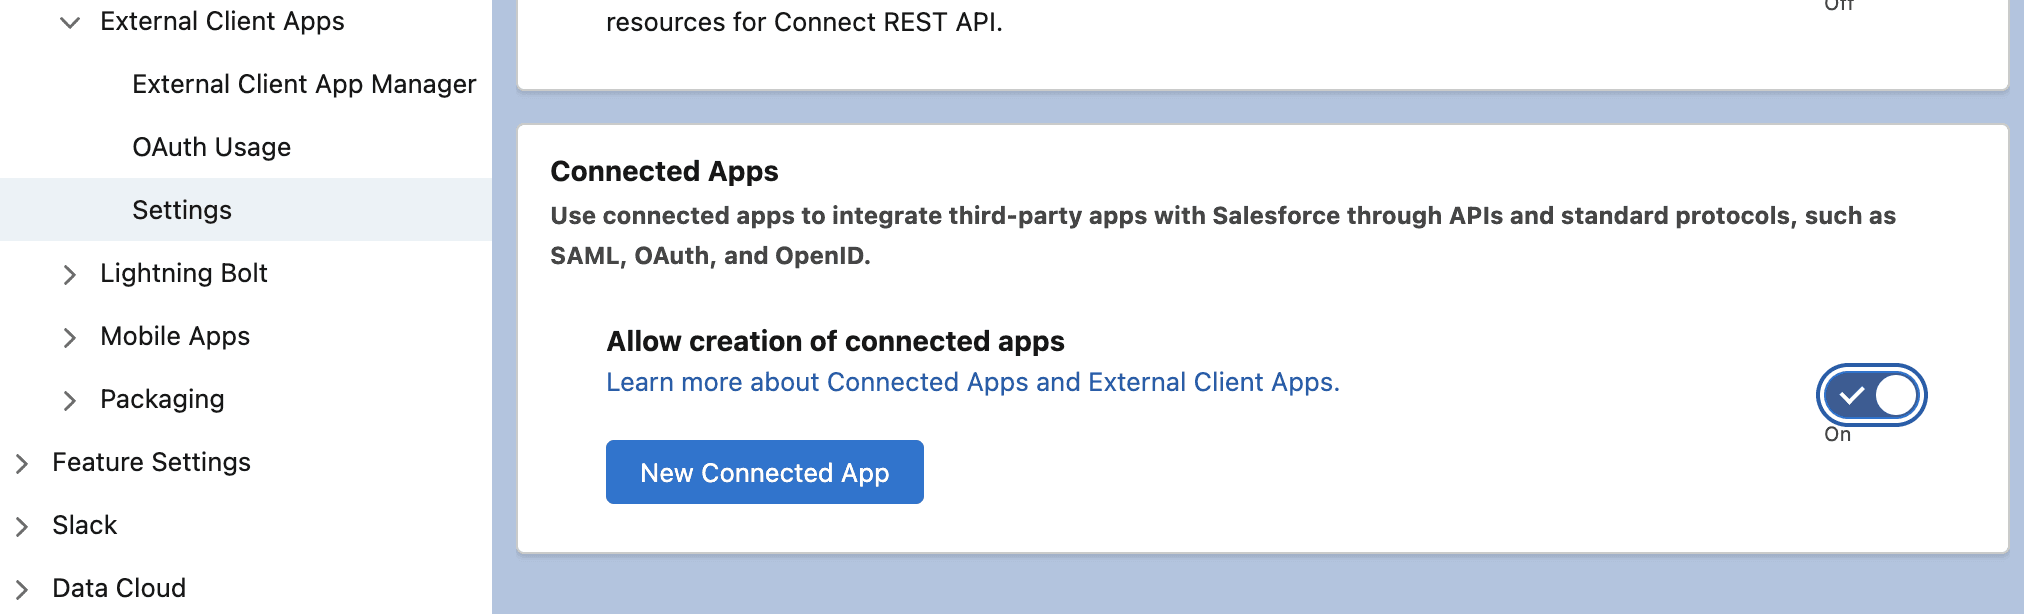
Make sure you tick the box for
Enable OAuth, which will prompt additional OAuth settingsEnter your Callback URL. If you’re building your native Salesforce integration with Paragon, you’ll input
https://passport.useparagon.com/oauth
You would technically configure scopes next, but we’ll come back to that in the next section as there’s a lot that can go wrong here.
Once you create your Connected App, you can grab your Salesforce OAuth application’s Client ID and Client Secret.
Configuring OAuth scopes in Salesforce
We see a lot of customers run into errors due to scope mismatches. There are two general causes:
You have not selected/requested the necessary scopes to make certain API requests
The scopes you’ve selected in the config does not match your install URL
Determining what scopes you need
If you (and/or your product team) already has a specification built out for the Salesforce integration, make sure to map out the Salesforce API endpoints you’ll need to implement the use case.
That will help inform the scopes you need - you can find more details here.
Matching up OAuth scopes
It’s critical for you to ensure the OAuth scopes you select in the Connected App configuration matches your install URL (where you redirect your users to from your application to authenticate).
Here’s an example install URL:
If there is any discrepancy between the two, your users will not be able to authenticate successfully.

If you’re using Paragon, which manages the end-to-end Salesforce OAuth flow for your application, you’ll need to input the scopes you’ve selected above in the integration settings.

Enabling users to authenticate their Salesforce account
In your application, you’ll have to build a Salesforce integration settings component or page, so users can enable and connect their Salesforce accounts.
The Connect button will need to link to the Salesforce auth flow (with the configured scopes).
If you’re using Paragon, paragon.connect('salesforce') will pop up the Connect Portal which will take your users through the entire authentication flow.
Here’s an example with our AI chatbot demo application.

Testing your OAuth flow & scopes
Ensure you’ve set up your OAuth application, the scopes, and the OAuth flow correctly by having a developer connect your Salesforce developer account via the OAuth flow, and have them make test requests to the endpoints you need for your integration use case. If you just want to test the connection, here’s a sample request you could make:
If you’re testing in Paragon:
Connect your Salesforce Developer account via the Connect Portal preview (to check the OAuth flow)
Build a test workflow and click Test Step (to ensure you have the necessary scopes)

Deploying to production
If you’re building a native Salesforce integration for your application, there are many additional considerations to watch out for, including:
OAuth token refresh policies
Salesforce API rate limits
Paginating through records
Handling multi-tenancy
That’s why engineering teams at over 150 B2B SaaS companies use Paragon as their embedded integration infrastructure, so they can focus on the integration logic instead of worrying about the integration & authentication UX or the plumbing.
Sign up for free and see how it can save you 70% of the engineering hours on Salesforce and 100+ other integrations. You can also check out our documentation here.